Backups Protect Your Website From Disasters & Hackers
You pull up your e-mail and there’s a really odd message waiting for you. Then, a friend tells you your website looks weird. You quickly open it and there’s a message on the front page: “Hacked by ___.” Your content is erased. You wonder how many people have gone to your site and seen this violation.
You’re in full panic mode.

Then, you remember reading a post on Orange Fox about completing a website backup. You remember that you followed the semi-tedious process of backing up your website.
You exhale a sigh of relief knowing that your site will be back to normal in a short matter of time.
Unfortunately, this is not the story most business owners tell. Most business owners do not realize how crucial it is to have a backup of their website until it is too late. Many times, they’re stuck paying to build a brand new website and cringing over the lost content and investment in their site. Sometimes, owners lose invaluable data. Sometimes, an employee accidentally clicks the wrong button and half of the site crashes.
If you have a backup, you can restore your website in a number of minutes.
Your objective in this chapter is to learn how to implement a few quick and easy ways to backup your WordPress website.
Let’s get started. A few minutes of your time now could make all the difference in the world to you later.
How Often Should I Perform a Backup?
This changes from site to site and mostly depends on how often you are changing content. Most businesses build a website and only make the occasional change or tweak to the site. In this case, you can run a backup once a week or after any major changes. For businesses that are updating content regularly, we recommend a backup every day or two, in addition to a separate backup of major changes. This may come in handy if you have to “roll back” a few weeks.
The good news? Most of this can be automated, so you don’t have to spend a ton of time on backups.
Note: Whenever WordPress or plugins have updates, it is a great idea to perform the backup before running the update. This is another common reason people need their backups.
Who is in Charge of Backups?
Typically, the webmaster or IT person will keep track of backups. However, we advise that the CEO or a senior level person has a secondary copy just in case. Occasionally, website companies and business owners have a falling out and that can lead to nasty issues (such as the web company refusing to provide the website content to the site owner).
How to Perform a Backup
We advise having two backups. Why?
Security of your content.
We recommend storing one on your server where your other files are hosted, and one in Dropbox and on a local computer.
Are there other methods to perform backups? Yes. Will your web host typically keep a copy? Yes.
However, the backups we will explain below will offer you a quick and easy way to restore your content.
Method 1 – Backup to Server
There are a number of plugins which perform this backup function. Some are paid, some are free. The one that we recommend, XCloner, is currently free, easy to use, and takes less than 5 minutes to set up.
Step 1: Go to your WordPress dashboard, hover over “Plugins” and click “Add New.” In the upper right hand corner is a search box, type in “XCloner.” Click on “Install Now.”

Step 2: On the next screen, click “Activate Plugin.” You will have a new item under the “Plugins” header on your left hand menu called “XCloner.” Click on it to go to the settings screen. The dashboard is relatively straight forward, with a few words that may be unfamiliar to you; don’t worry, those won’t impact your ability to run a backup.
Step 3: Click the “Generate Backup” button. This will begin the backup process.
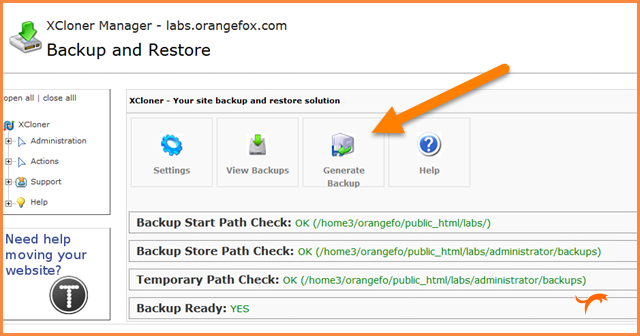
Next you will be brought to a screen to customize your backup. You will have the choice to exclude certain sections of the website. Most businesses will simply backup their entire site.
If you are doing a backup of a large update or change to the site it might be helpful (but isn’t necessary) to add notes to the “Backup Comments” tab.
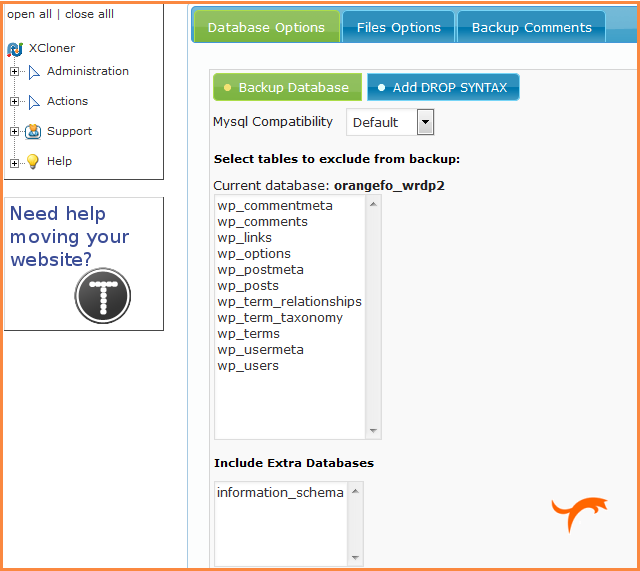
Once you have finished with your settings click the big blue “Continue” button in the upper right corner.
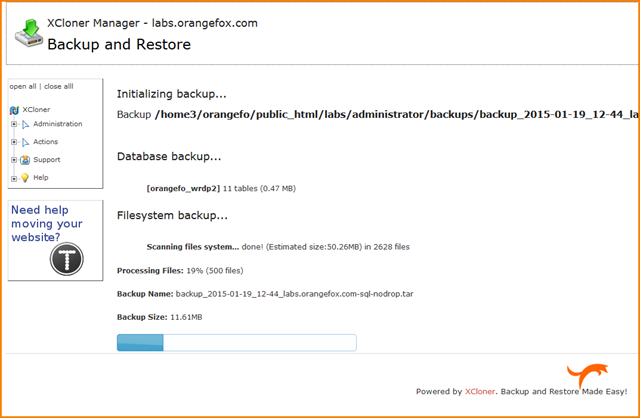
Step 4: As the backup is running you should see a screen that looks like the one below. The size of your site will determine how long it takes to complete the backup. Sites with 5-20 pages usually take less than a minute; larger sites take longer. Do not click away from this page while it is running!
Once the backup completes you will see a message like this. If there was an issue you will be notified.
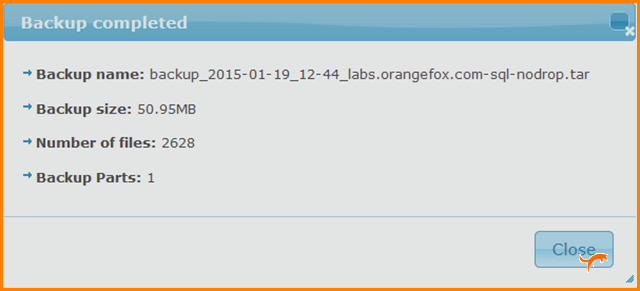
Awesome. You’re done with your first backup.
It will be stored on your server for emergency purposes. You can also download a copy of these files to your computer. To download, click on “View Backups.” On the following page you want to click the disk icon next to the backup you want to download.

Note: This is a completely manual process. In other words, every time you want a backup, you will need to click “Generate Backup.” Since it can be easy to forget this, we’ve added a second method that automates the backup process below.
Restoring your backup
To restore the backup you will have to follow their instructions. It takes a little bit of work, but if you follow the instructions you should have your website back within a half an hour. For the purposes of this guide, we’re simply covering how to create a backup.
Method 2 – Backup to Dropbox
Dropbox restorations are difficult – it takes more time to setup than programs like XCloner.
However,
Dropbox backups are great – they’re easy to do and once set up, are completely automated.
Step 1: You need a Dropbox account. If you don’t already have one, you can sign up for free in just a few minutes. Go to Dropbox.com and follow the instructions.
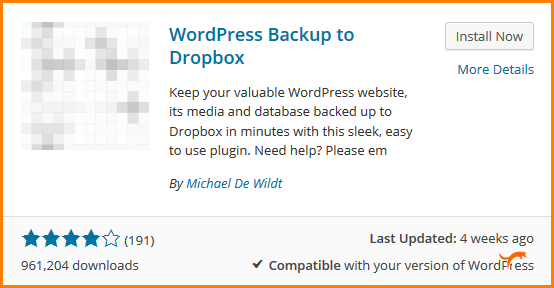
Step 2: Download the plugin. Find it by going to “Add Plugins” in WordPress. Search for “WordPress Backup to Dropbox” and click “Install Now.”
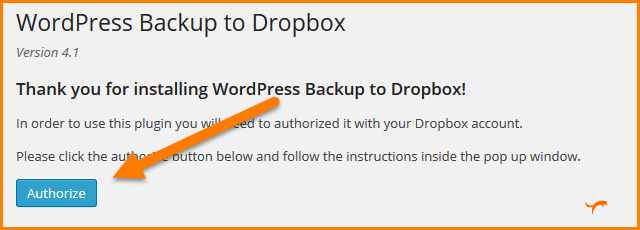
Step 3: Activate the plugin. After activation, click on a new item in the menu on the left called WPB2D. The first time you will need to authorize your account. To do this click the “Authorize” button.
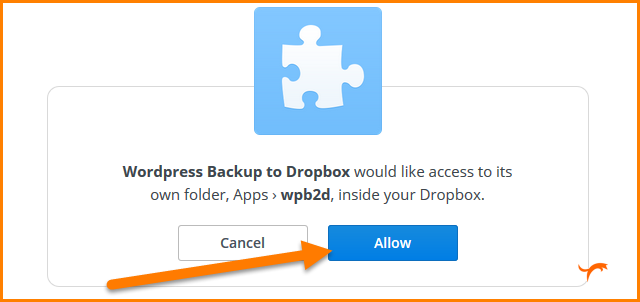
You will need to verify that you want to do this; click “Allow.”
After you authorize the app you will see a confirmation message. Next you will be brought to the dashboard for “WordPress Backup to Dropbox.”
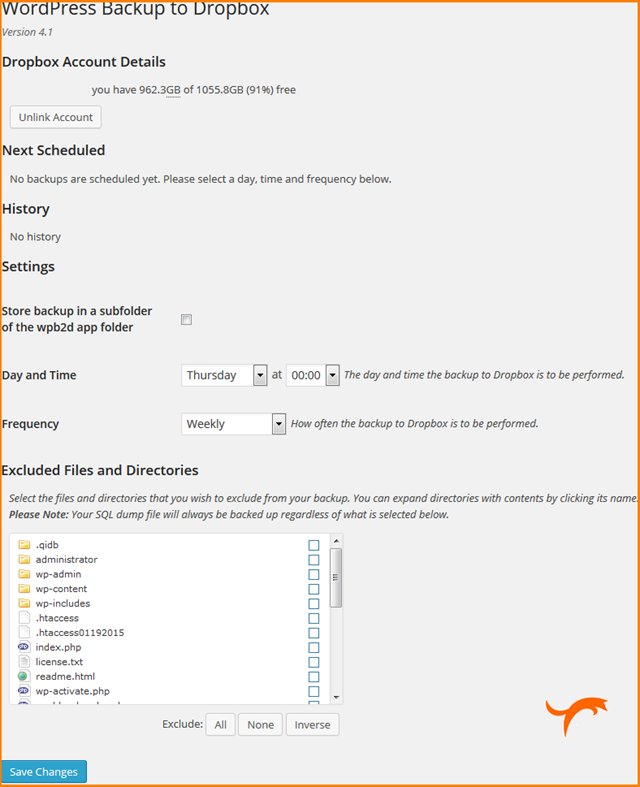
Settings
- Choose what time the update will be performed. The middle of the night, when you have the least amount of traffic and when people will not be making changes to the site, is a great option. (The time is pulled from your WordPress Settings -> General -> Timezone field so make sure your timezone is set correctly.)
- You will need to choose how frequently to backup. We recommend weekly for most businesses; however, you can adjust this depending on how often you change content.
- If you would like to exclude any folders or files, check the boxes in the “Excluded Files and Directories” field. Most people choose to backup everything. Click “Save Changes.”
To verify everything is working properly we recommend doing a manual backup the first time. To do a manual backup, click on “Backup Monitor” under the WPB2D menu on the left hand side.
Since you’ve never performed a backup the screen should look like this:
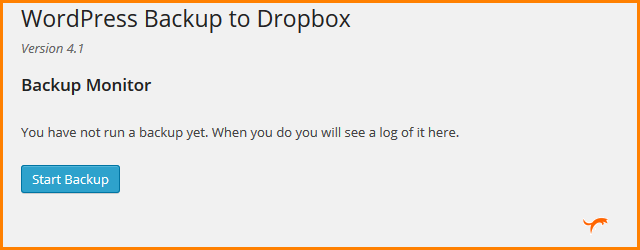
Performing a manual backup
- Click “Start Backup.” The backup will take a few minutes.
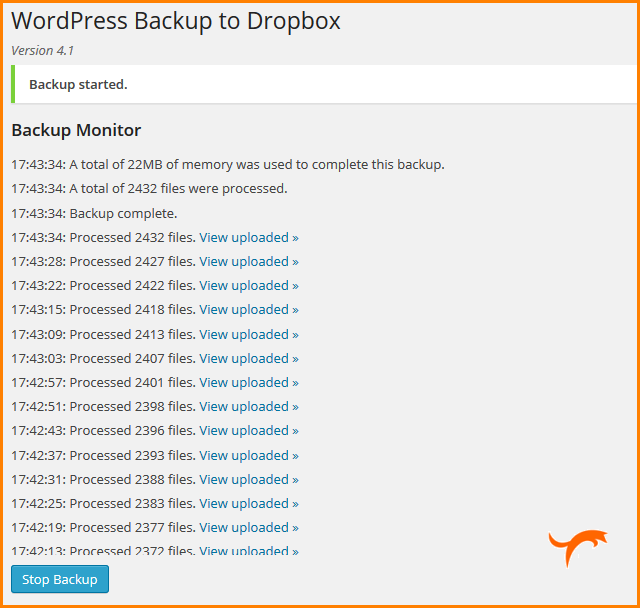
- We recommend you leave the window open to make sure everything runs smoothly the first time. (Larger sites take more time. Although it’s not the fastest, it will work automatically once the setup is complete.)
Once the backup is complete you will see a notification like this:
Hooray! You’re done backing up your site!
You’ve met your objective in this chapter to learn how to implement a few quick and easy ways to backup your WordPress website.
Final Thoughts
While keeping a backup is not the most exciting thing in the world and will not directly increase traffic, leads or sales not doing it can cause huge headaches down the road. Creating a backup is a free insurance policy against issues with your website. Hopefully you will never have to use them and your site will never have issues, however if you do you will be glad you spent a little time getting this setup rather than building a new website from scratch.
By now, you’ve taken some time to analyze, improve and protect your website. You’ve put in some extra work now to prevent headaches later.
Feel free to go back to previous chapters to revisit information or go back to anything you may have skipped or “saved for later.”
Congrats!